I have been using DynuDNS for some time, for the purpose of routing my external IP to a purchased domain name - with the added bonus of creating an SSL certificate for free via the Let's Encrypt feature built in. My goal was to have a publicly accessible secure Home Assistant URL so I could implement Alexa integration.
Recently I decided that I wanted to host other services, and found NGINX, specifically the NGINX Proxy Manager add-on for Home Assistant, via HACS. With the use of this add-on I was able to route additional sub-domains I created on DynuDNS to internal IP's within my network.
I did some have problems along the way and wanted to share how I solved them.
First off, I had to retire using DynuDNS as my SSL certificate provider this required me to remove/comment-out some lines from my configuration.yaml, specifically the following:
http:
# removed SSL for NGINX
# ssl_certificate: /ssl/fullchain.pem
# ssl_key: /ssl/privkey.pem
I also had to add the following, because not I am using NGINX as a forwarder
use_x_forwarded_for: true
  trusted_proxies:
    - 192.168.0.9 # IP of Home Assistant with NGINX Addon
    - 172.30.32.0/24 # Subnets required by NGINX - found in NGINX addon log
    - 172.30.33.0/24 # Subnets required by NGINX - found in NGINX addon log
And then within the DynuDNS addon I had to set the following parameter false within the lets encrypt section.
accept_terms: false
Now with the NGINX Proxy Manager installed, using the default configuration, I had to modify my configured port forwarding settings on my router, previously I was forwarding incoming connections on port 443 to port 8123 on my home assistant installation IP - but now since I am using NGINX to handle this routing - changes where required.
I modified my port forwarding rule to forward incoming connections on port 443 to port 443 on the home assistant installation IP, because that is where NGINX lives.
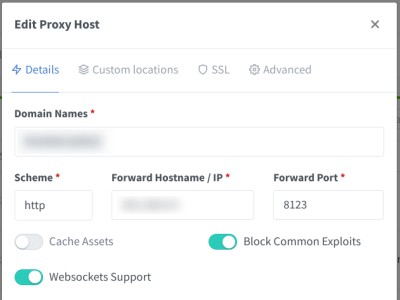
With NGINX now setup, I had to configure my proxy hosts, specifically I needed to restore my secure public connection to home assistant, to maintain my Amazon Alexa integration.
Configuring a Proxy Host in NGINX is fairly simple, define your public domain, define your scheme (HTTP or HTTPS), define your local IP and Port.

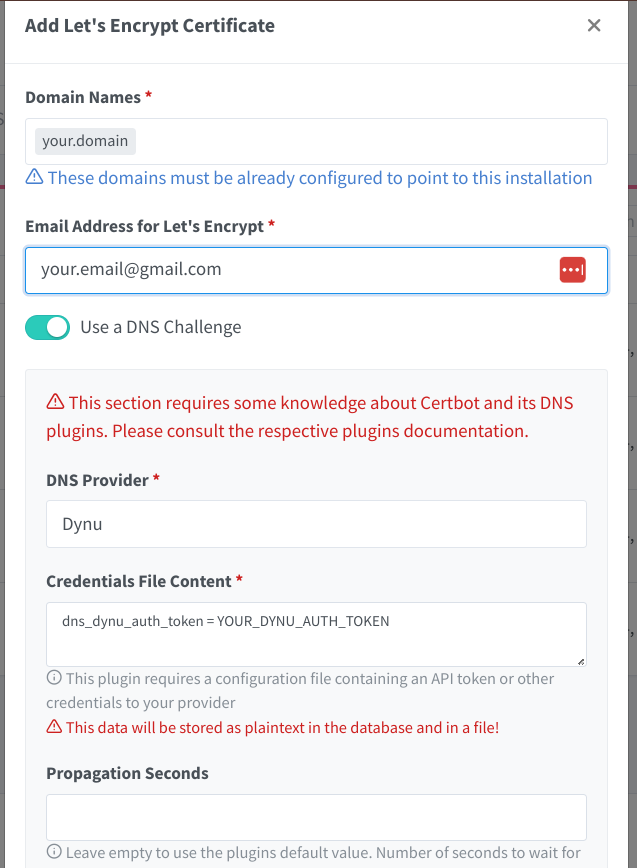
For the SSL certificate, this requires a separate step as I found doing it all at once to be problematic.
Navigate to the SSL certificate tab in NGINX, and click Add SSL Certificate. Put in your domain, your email, (I need to enabled DNS challenge since I am using DynuDNS), your DNS provide, any required information for your DNS provides, and finally agree to the Lets Encrypt Terms of Service.

This will take a few moments to complete, once setup go back to your Proxy Host setting and edit it to define the SSL certificate you just created, found under the SSL section.
And that's it, you should be all set with Home Assistant on a secure domain name using NGINX for reverse proxy goodness!